Using a Reflector to Lighten up Indoor Videos
Since I began filming myself indoors, I noticed that my side facing opposite of the window wasn’t bright enough. Shadows were too dark and sometimes I was forced to bring shadows’ lighting up a notch during post production. Of course, it’s always better to improve lighting before shooting, so I went on and ordered by first cinematography add-on: a reflector!
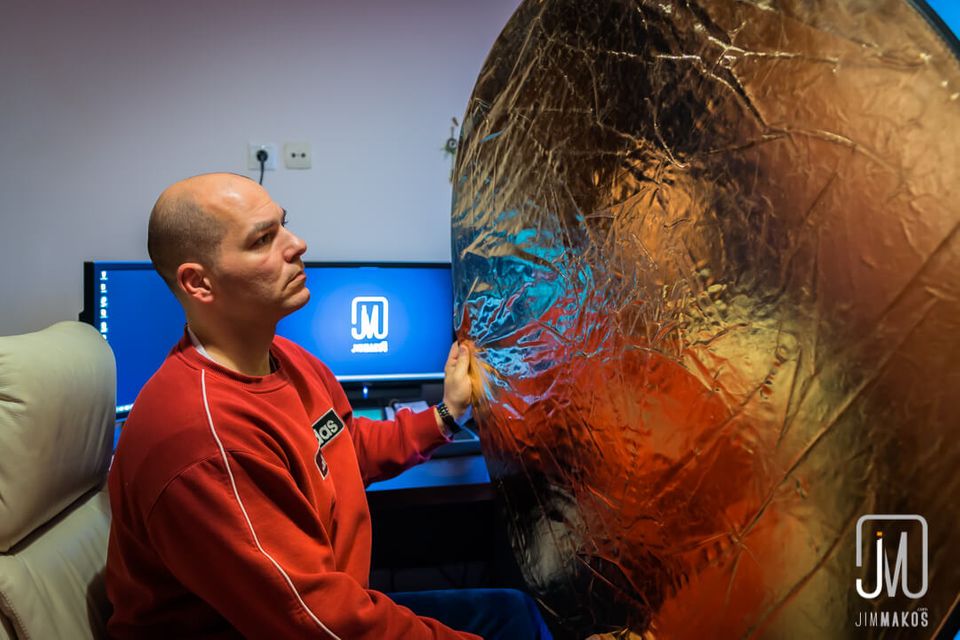
A reflector is the cheapest way to lighten up a scene, especially in interviews. In my case, my setup places me in front of my computer, having a window on my left. The sun provides free lighting, yet my right side is poorly lit. That’s because there’s a concrete wall and usually a closed door at that part of my office.
Being a beginner in photography and impatient to try out my new reflector (bought for $18 at Amazon), I went on and did some testing , despite the rain pouring outside. I will probably update this post with more comparisons when the sun shines again (it’s been cloudy and rainy the past few days in Greece).
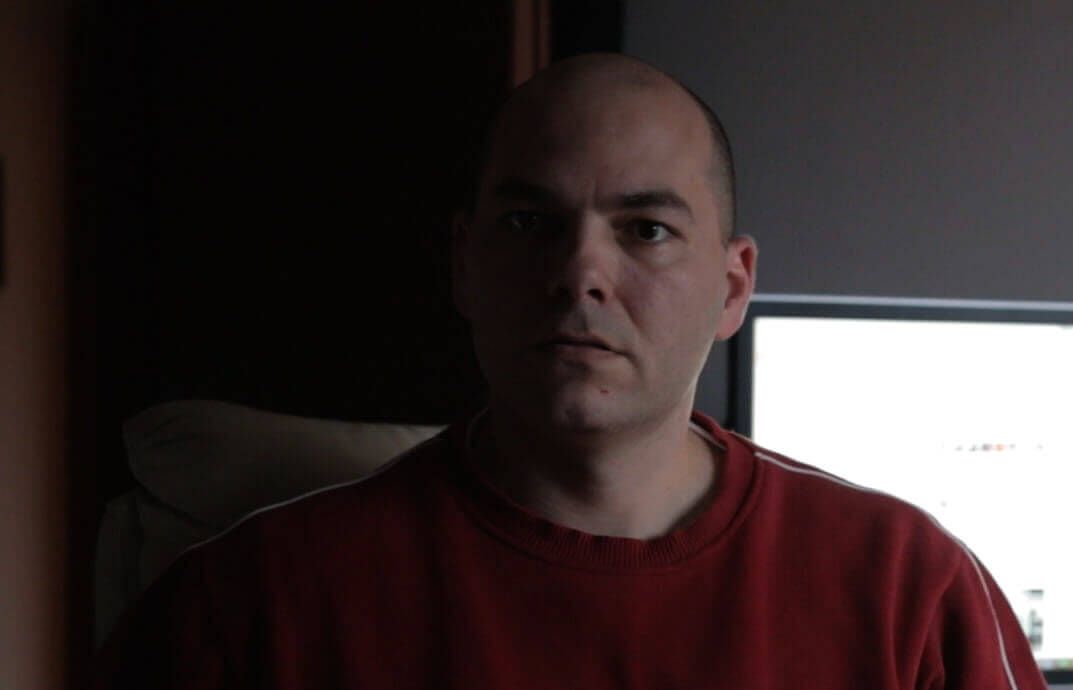
Without further ado, here’s the closeup of a video (unedited) still without the reflector.
And here’s with the reflector’s silver coating, pointing to the dark side of my face (at least, I tried to):

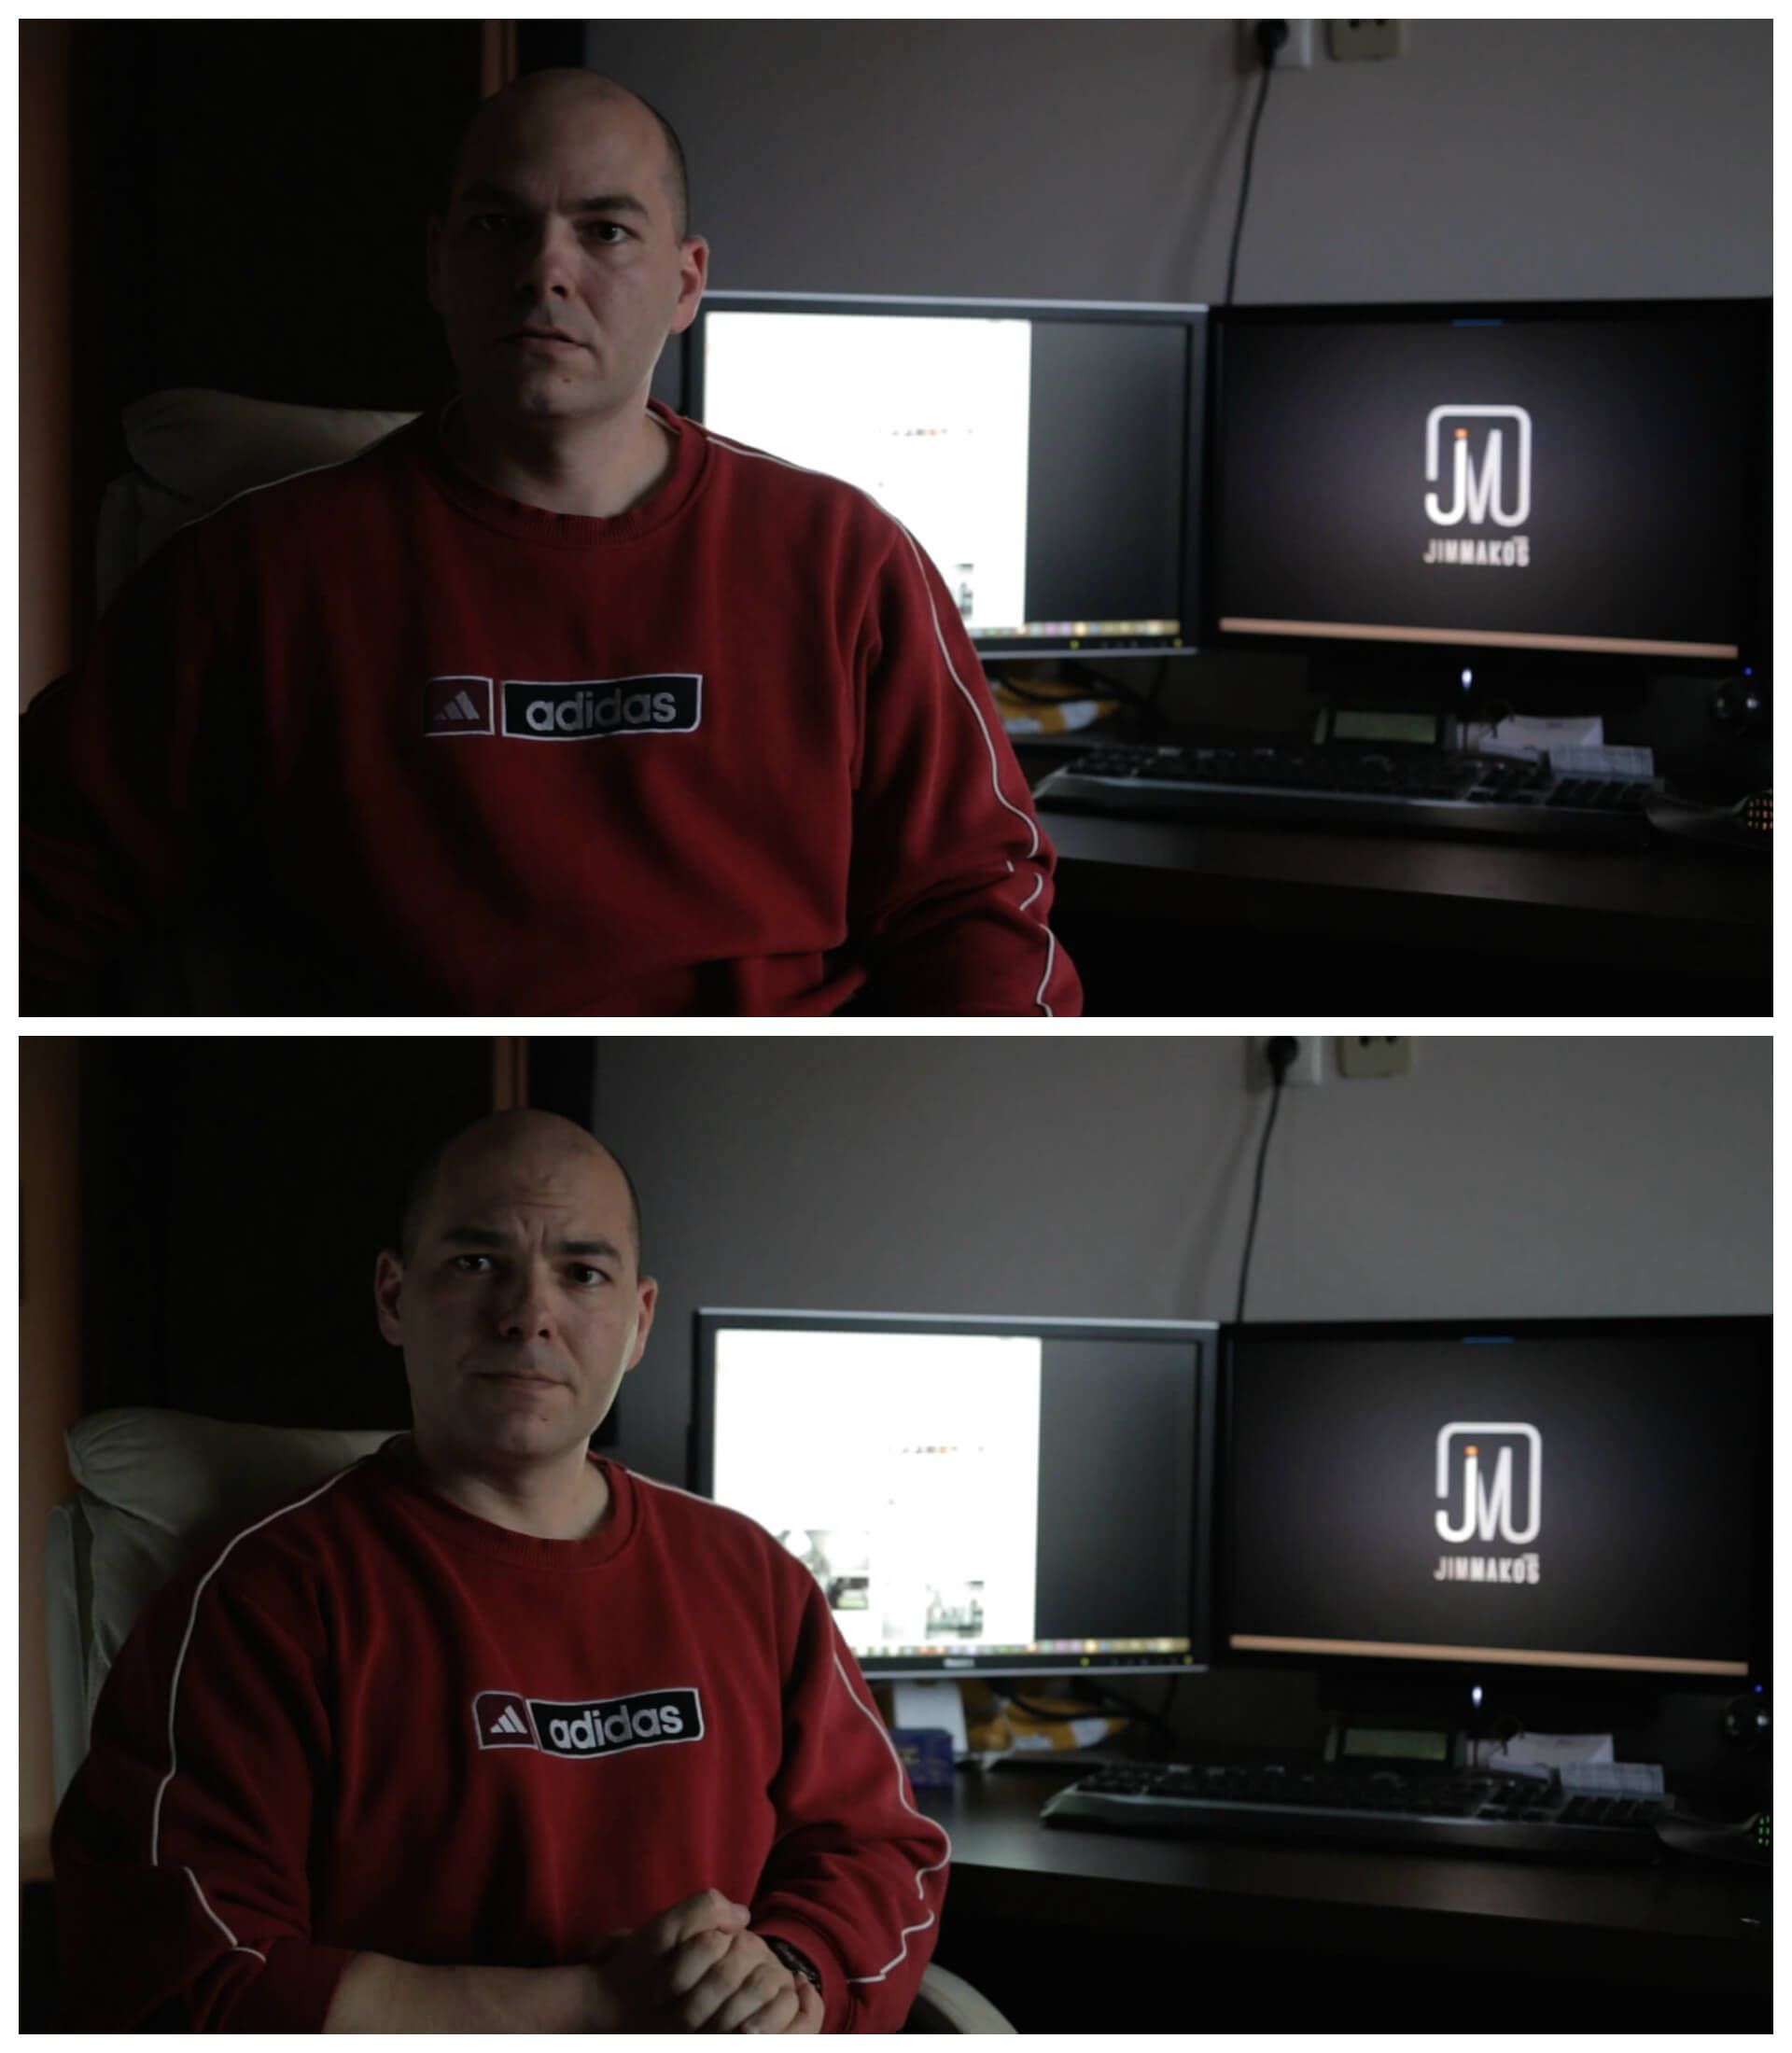
Finally, this is a comparison of the video stills at full size. I suppose it’s pretty obvious which is which:
Beginners in videography like myself wondering how a reflector works, will definitely find this short video useful.
Member discussion