

It is not long since I began getting seriously involved in photography. In fact, it is less than a year. Yet, during this short period of time I had to face one of the most significant challenges modern photographers deal with: how to most efficiently promote my work through social media.
Note that when I mention photographers, I do not only refer to professionals.
Nowadays, each of us has become an amateur photographer carrying around at all times a full feature camera: the smartphone.
After you captured a photo, what would be the most direct route so as your creation becomes available online to your friends and followers? Exactly how and where are you going to publish it, in order to reach at the same time all your accounts on Facebook, Twitter, LinkedIn, Google+, Instagram, Flickr, Pinterest…?
Apart, of course, from the very personal moments. But then again, what’s the meaning of taking pictures we can hardly share?
Posting your photographs online
First of all, we must determine whether we should focus on a single social network only or joining and uploading to several social media. Obviously, our task would be easier in case, for example, we decide to post our photos only on Facebook.
<Click>, upload, write a short description, share! You are done!
That would need no more than just a few clicks to upload the photo accompanied with a couple of catchy lines, and then the final click on the “share” button. Mission accomplished!
In the meantime, till the next moment is captured and posted online, we simply keep track of how our last creation performs on the internet in terms of likes and shares.
That said, obviously less work and effort come with a catch when you are focusing exclusively on a single social network. If, for example, I do not use Facebook – as sophisticated as this may seem – I would never have the opportunity to take a look at your pictures. Furthermore, even though I may have a Facebook profile I might prefer Instagram or Twitter instead, which you have never joined or posted photos. Bad luck or “fail”?
On the other hand, some people would argue that it pays to direct your audience towards a single destination, for instance, Facebook (or any other social network for that matter). Let’s examine some likely scenarions.
Case 1:
-Do you have a website?
-Sure! Why don’t you visit my Facebook page? My nickname is amazingphotographer79.
Case 2:
-Jim, where can we find the photos you’ve taken during our journey?
– On Facebook, guys…
Case 3:
-I’ve heard of one photographer, named Jim-something, who specializes on vintage pictures of CDs/luxury cars/nude girls and weapons…
-As a matter of fact, he is my friend on Facebook. Check my likes.
This option minimizes your risk for mistakes as well as the time spent updating multiple accounts on several social networks. Generally speaking, I would not object that. In fact, I would opt for the same route if the internet was not part of my life 24/7.
But, in contrast, I have joined almost any social network available on the web today. You get the idea…
Photo sharing the easy way, quickly to all social profiles
Easy? OK, strike this out. It’s more likely that it seems easy to me personally now that I got used following a certain procedure. Let’s talk about this very procedure.
What you will need:
- Photo editing software, also useful for archiving your photos. My choice is Adobe’s LightRoom – at the top of the list of similar applications according to several reviewers. If you are planning to get serious in photography and mean business, then Adobe’s subscription model charging €10 per month for its services seems quite reasonable.
- A social media message relaying service. A great deal of online services provide this option. Personally, I use Friends+Me, which allows posting on Google+ before the message is also published on Facebook, Twitter and LinkedIn within minutes. But, probably you do not need the service since, for example, Facebook would encourage you to link your account with your Twitter profile. Automatically, whatever you write on Facebook is copied and posted on Twitter as well. Alternatively, using IfThisThenThat coding routines could be a solution. However, you get what you pay for.
- Access to your accounts. Say what? Yes, this can be a challenge too. Do you remember that forgotten Yahoo account you set up long time ago? Funny, now that you mention it… Well, that old and neglected account could give you instant access to Flickr, a popular service Yahoo provides to photographers. Wouldn’t it be a shame not taking full advantage of this feature? Moreover, with your Gmail account you regularly use, you gain access to Google Photos, a recently upgraded service.
In general, finding reliable online services to upload your photos would not be a problem unless, of course, you get lost somewhere between these services. And that’s what I will help you to avoid today.
<Click>. You took the photo. What’s next?
Well, it depends on that “click”. Was it a “click” that came from your camera or another subdued sound coming from your cell phone? Let’s take these, one by one.
8 photo sharing steps: From the digital camera to the social media
Let’s find out what exactly I do after I take a photo with my camera, a Canon 70D.
- <Click>
- I take the memory card with the new pictures off the camera and into the PC.
- Instantly, LightRoom appears so I import the files to the relevant category. During the process, the photos are automatically subjected to a number of adjustments that I have set earlier as general rules. For instance, sharpness is increased to 50 and noise decreased to 30 among other settings, while my website and a number of other general metadata keywords are added in file properties. In this way, I save a great deal of time.
- I mark with one star the photos that seem interesting. You may take a lot of pictures but hardly a small number among them worth the effort. Remember the Pareto Principle. After I have edited the photos, I raise the ratings to two stars. Next comes the title, description and category ranking and the photos are marked to 3 stars. This is the point where I feel satisfied enough to show the world my work.
- LightRoom enables you to upload photos on Flickr, Facebook, 500px and other websites from the same user interface. I have programmed the application so when the rating of a photo is 4 stars the file is added on my Flickr collection, while 5 stars will mean that the photo is good enough to be posted on my 500px account as well.
- By classifying the photos according to their ratings as 4-star and 5-star, I know which photos have been already published on the aforesaid websites. It remains to export the files as JPG images in order to upload the photos on Google Photos. By sharing them at Google+, the pictures are distributed almost immediately to Facebook, Twitter and LinkedIn.
- I care about my friends on Instagram as well. So, the selected photos are automatically copied on my cell phone thanks to the synchronization service provided by LightRoom and then are posted on Instagram without filter editing, since the files have been already improved and tweaked through LightRoom. To be noted that since the application of Adobe is my main working environment, any adjustment of the photo that will take place later on LightRoom – for example If I want to change the photo to a black and white image – automatically updates the copies stored on the cell phone, Flickr or 500px. Cool, right?
- Finally, if you have a Pinterest account you might find this extension plugin for Chrome very helpful, which allows you to “pin” photos while surfing the web. Thus, after your photos are online on various networks, all you have to do is open each image and “pin” it while you are logged in on the specific profile you wish to promote. However, since only Google+ and Flickr allow uploading full-sized photos (for example, 20 megapixels) I choose one of them to upload the original picture. If I wish to sell the rights of a picture, I pin the photo from my 500px profile. It is rather a question of how you want to take full advantage of your photography skills.
Hence, your photos are already online and reachable on all social media of your choice with the exact same description. You did not have to write again and again the same words dubbing the same picture since the initial message and description of Google+ are included everywhere.
Hey, did you get how much time and effort you just saved so far?
Photo sharing from the smartphone to Instagram and much further

Let us now follow the sequence of me taking a photo and sharing it using my smartphone.
- <Tch-tchick>
- The photo automatically gets uploaded to the synchronized album of LightRoom, as I explained earlier (sync service). Instantly, the photo is included in LightRoom’s catalog, the Adobe’s cloud service and is also available on my computer’s hard disk. Quickly and automatically. Not to mention the bonus of having a backup of the photo instantly on the web!
- I just follow the steps detailed on the previous paragraph – after the fourth step.
In this way, it makes no difference whether I take a picture with my camera or my cell phone, since ALL photos are eventually stored on the same medium: my hard disk(s). I can now delete the photos from the cell phone or flash memory of my camera in order to have always free space for new photos. Furthermore, I have NOWHERE the SAME picture saved, meaning that I do not spend my entire life searching amongst dozens and dozens of duplicates when I want to locate a single picture.
However, do not forget to have a reliable backup method in place, since eventually your hard disk will break down. I have chosen Acronis True Image for that purpose.
So, in summary, each photo I want to edit I can find it in LightRoom and for every picture I want to post online, the procedure remains the same.
We’re not finished though. What happens when you take a picture and want it posted online AT ONCE?
Photo sharing online, the expedited way
Usually, these photos are taken using your mobile phone. You see an accident on the road, you come across a cat holding a mouse on the mouth, you just bought your new car/house/smartphone/jewelry/clothes/shoes or… gums. You took a selfie having a great time submerged in… champagne.
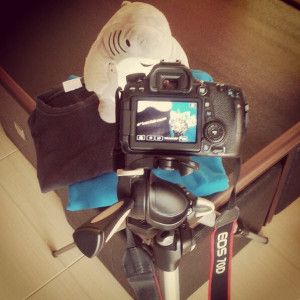
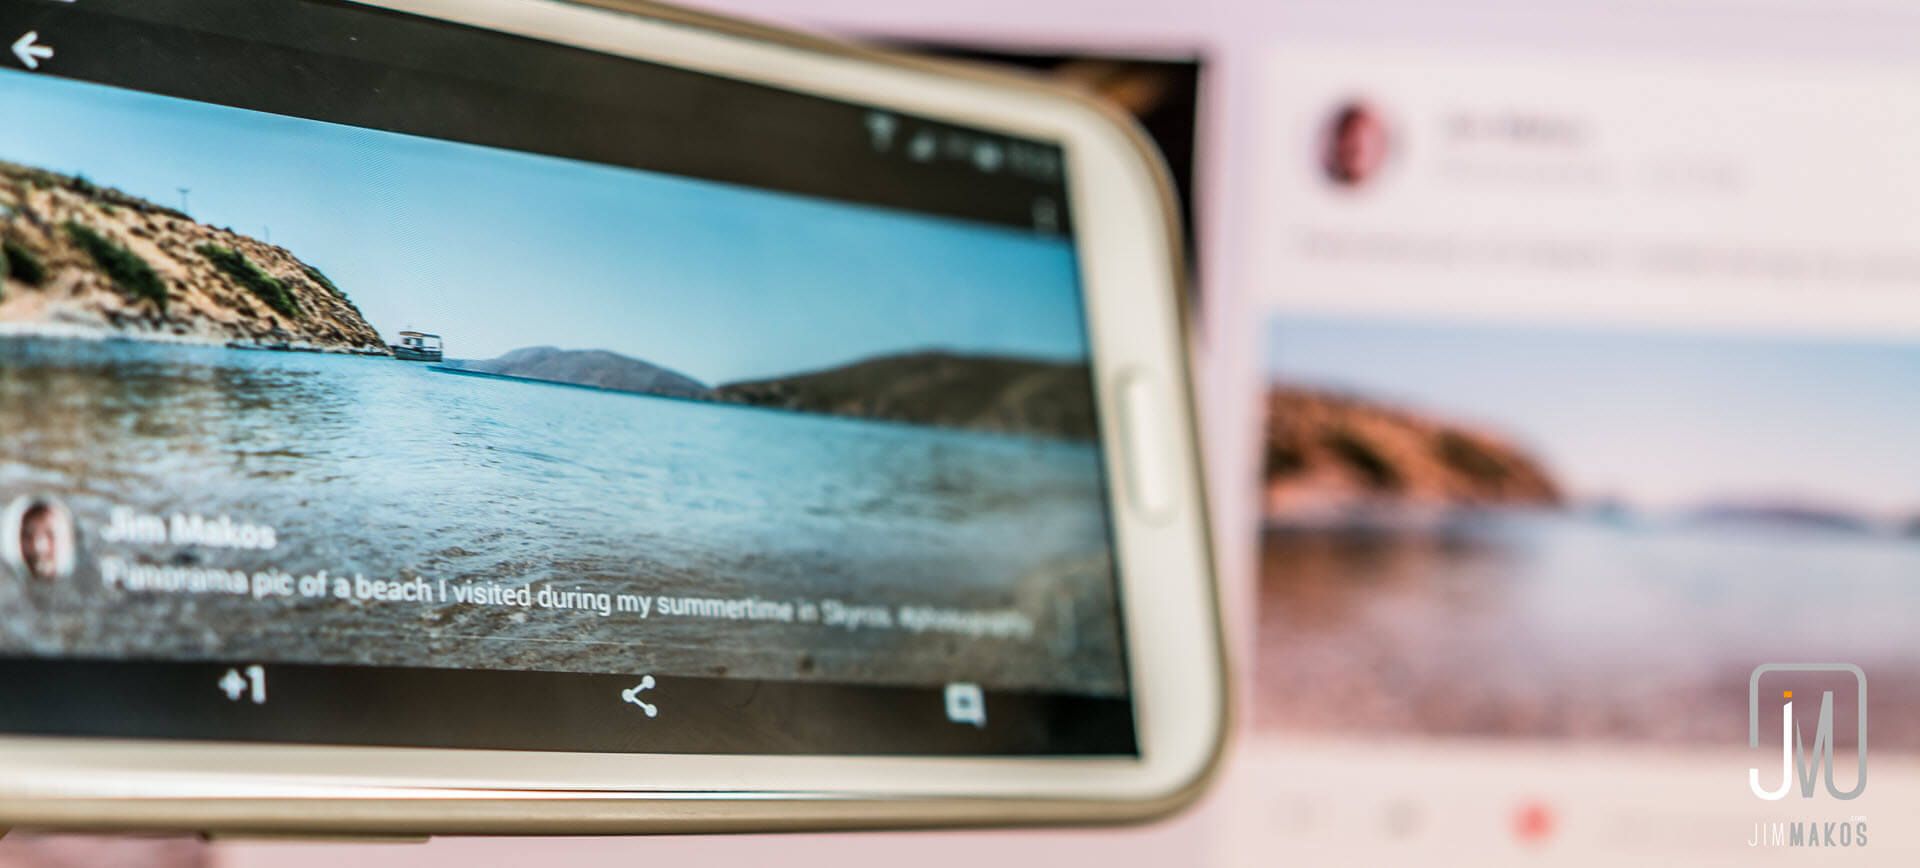
Photo from my Instagram profile.
Hello world! Here I am! Look, look at me! Wow, just look what happened right before my eyes, right NOW.
That kind of thing. Or, you simply want to share some of your activities.
You are not much interested in the quality of the photo. You could not care less about the proper light or white balance settings. All you are excited for is sharing the picture. The whole world can see right now what you have just experienced.
If this is the case, Instagram is your ally.
- <Tch-tchick>
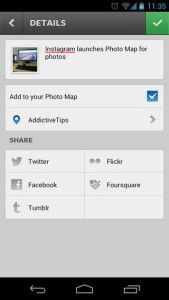
Posting on Instagram: The app offers multiple photo filters and adjustments on the fly. Not in a rush? You can retouch the photo, add your personal signature applying the effects that suit you the most. In a hurry? Just click next, next and done. That’s it!
- But, before you click on that share/done button, activate sharing on Facebook, Twitter and Flickr. Your photo will appear on these social media as well.
- Bonus: Since you have set “syncing” service on within LightRoom, the edited picture posted on Instagram is already stored locally on your hard disk along with the original photo! No picture and no versions of a picture ever lost!
- Extra bonus: If you care about quality even when posting on Instagram, and it happens to have a full feature camera with you, always take your photos using the digital camera instead of your smartphone. In the event your camera comes with WiFi functionality, you can adjust this so all photos are transferred to your phone automatically. Ta-da! Your 20-megapixel photo is ready to be uploaded from your smartphone to Instagram, Facebook, Twitter and Flickr. Guess what! All these pictures will be also available on LightRoom and your hard disk!
It is really up to you how you are going to make things work according to your personal needs. What is best for me may not be the optimal choice for you. However, take note that I have concluded on this specific workflow after long and thorough research.
For example, I studied how the well-known photographers and filmmakers update their profiles on the social media, such as Philip Bloom who recently visited Skiathos island in Greece – sharing some unique photos.

These guys accumulate a huge volume of images online. How do they manage to share their photos? How do they post their images online? Which services do they use? I found that reverse engineering research is not that complex on social media.
And of course, there is nothing wrong in mimicking a good method that works.
So, if you feel I have helped just a little by sharing a few tips that could make your photography life easier when you upload and share your photos or organize your albums, I would be glad to know about it reading your comments below.
Enjoy your <Clicks> and <Tch-tchicks>!
UPDATE 30/8:
Since I wrote these lines, I think I’ve found a better and quicker way to get your photos online. In brief, here’s what I do:
- Import and edit the photo on Adobe LightRoom, as described.
- The picture is sent to Flickr and 500px according to the instructions above. Export the photo to a predefined folder.
- The very same folder is already set as one of the sources for Google Photos Backup.
- The final, edited photo is available at Google+. I go on and share the photo automatically to Facebook, Twitter and LinkedIn, as explained (Friends+Me service).
- Using my smartphone then, I pick the photo at Google+ and I share it via Instagram. At the same time, I copy the pic’s description and paste it when sharing on Instagram, so that I don’t repeat the writing.
- That’s it! The photo is in your hard drive, in your Google’s album, on all major social networks and on the popular photography communities. You want more?
Let’s now describe the drill with an example, starting from step 3.
How we share a photo from LightRoom to Google Photos
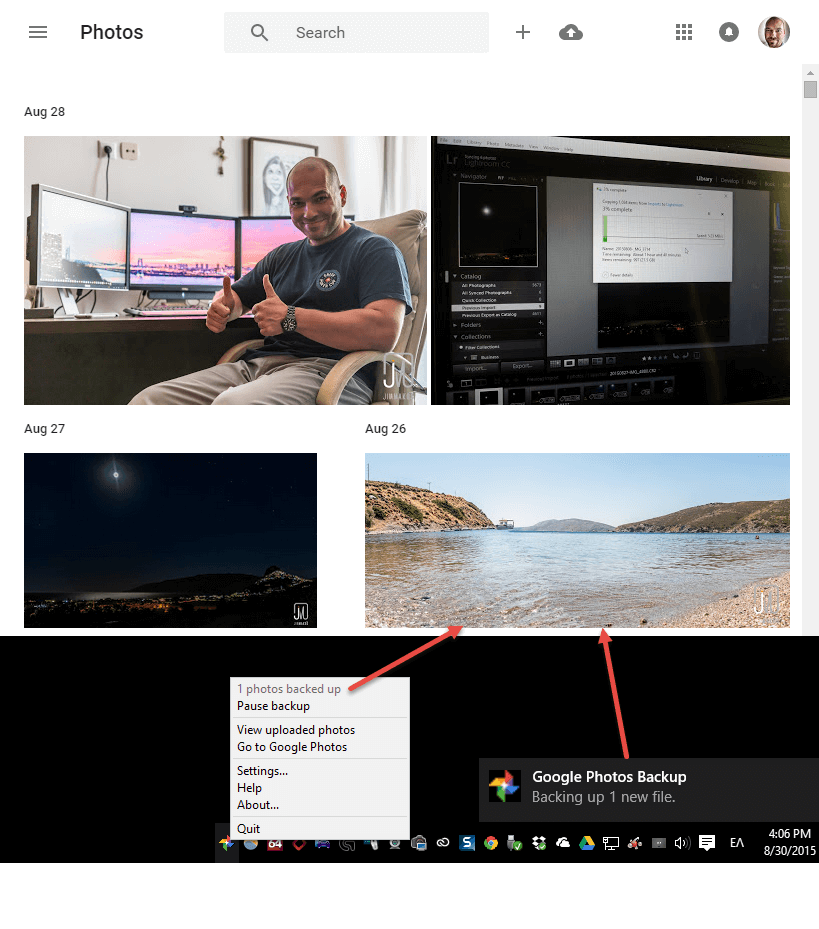
First things first. Download the Google Photos app for desktop. Then, connect your Google account and pick the folder, which will act as your backup source. Every photo in that folder will auto-import in your Google album.
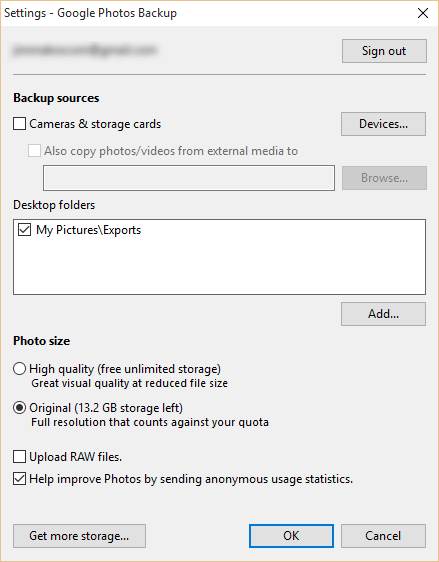
Next, choose the same folder as the export location of your LightRoom photos.

In this example’s photo, I right-clicked and chose to “Export with Previous”. According to the export settings, the photo is exported in high-quality JPEG format in that very folder.
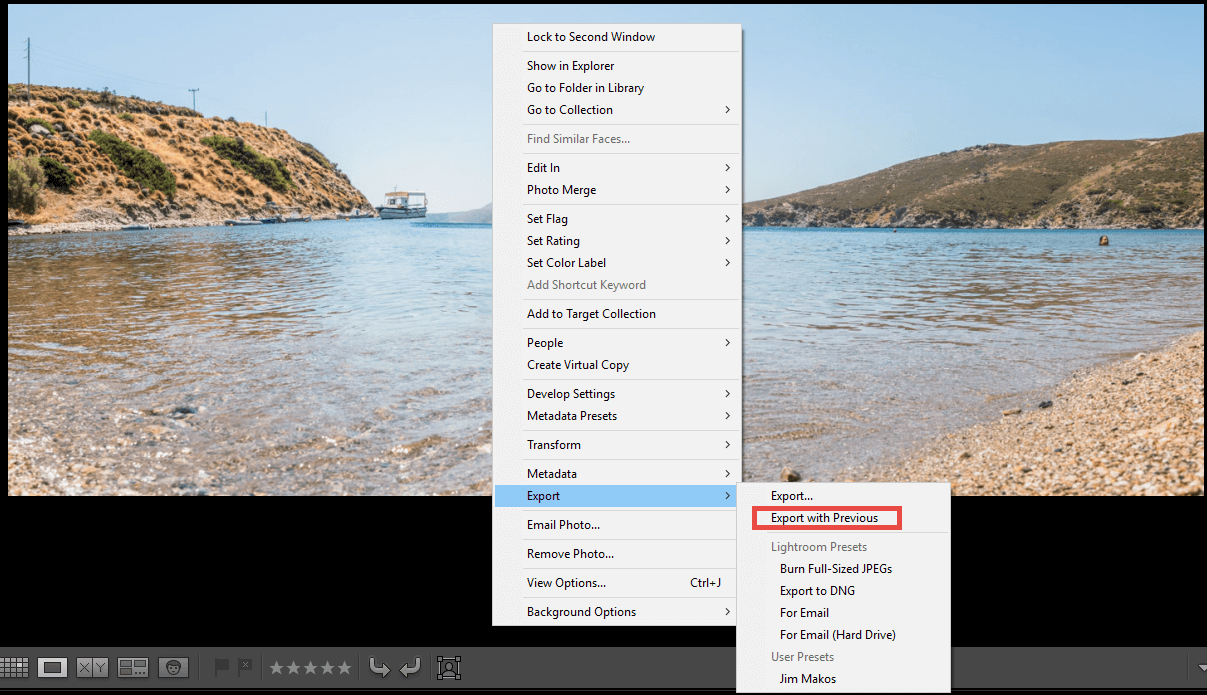
Automatically, the photo is uploaded to Google Photos!
Sharing to Instagram from Google Photos
From this point on, and given I shared the photo to social media…
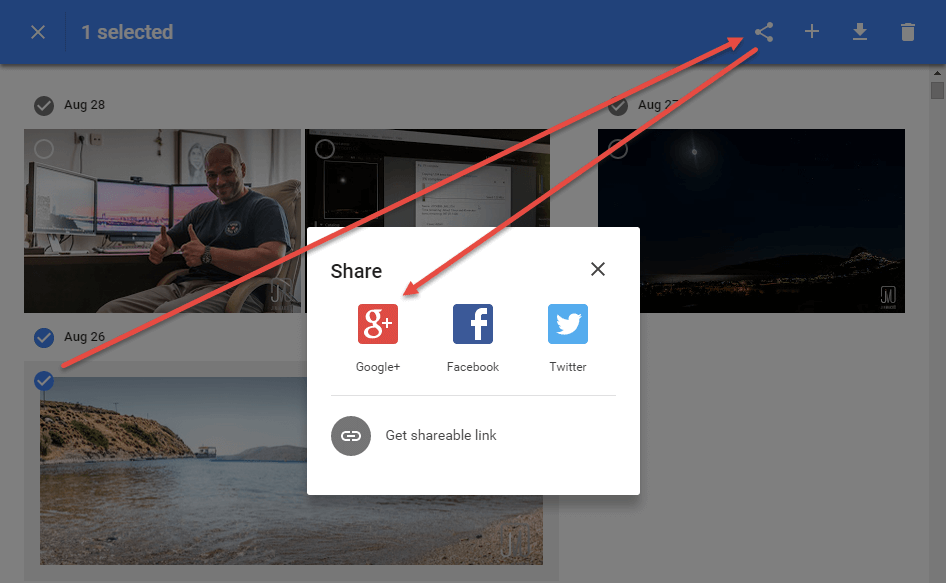
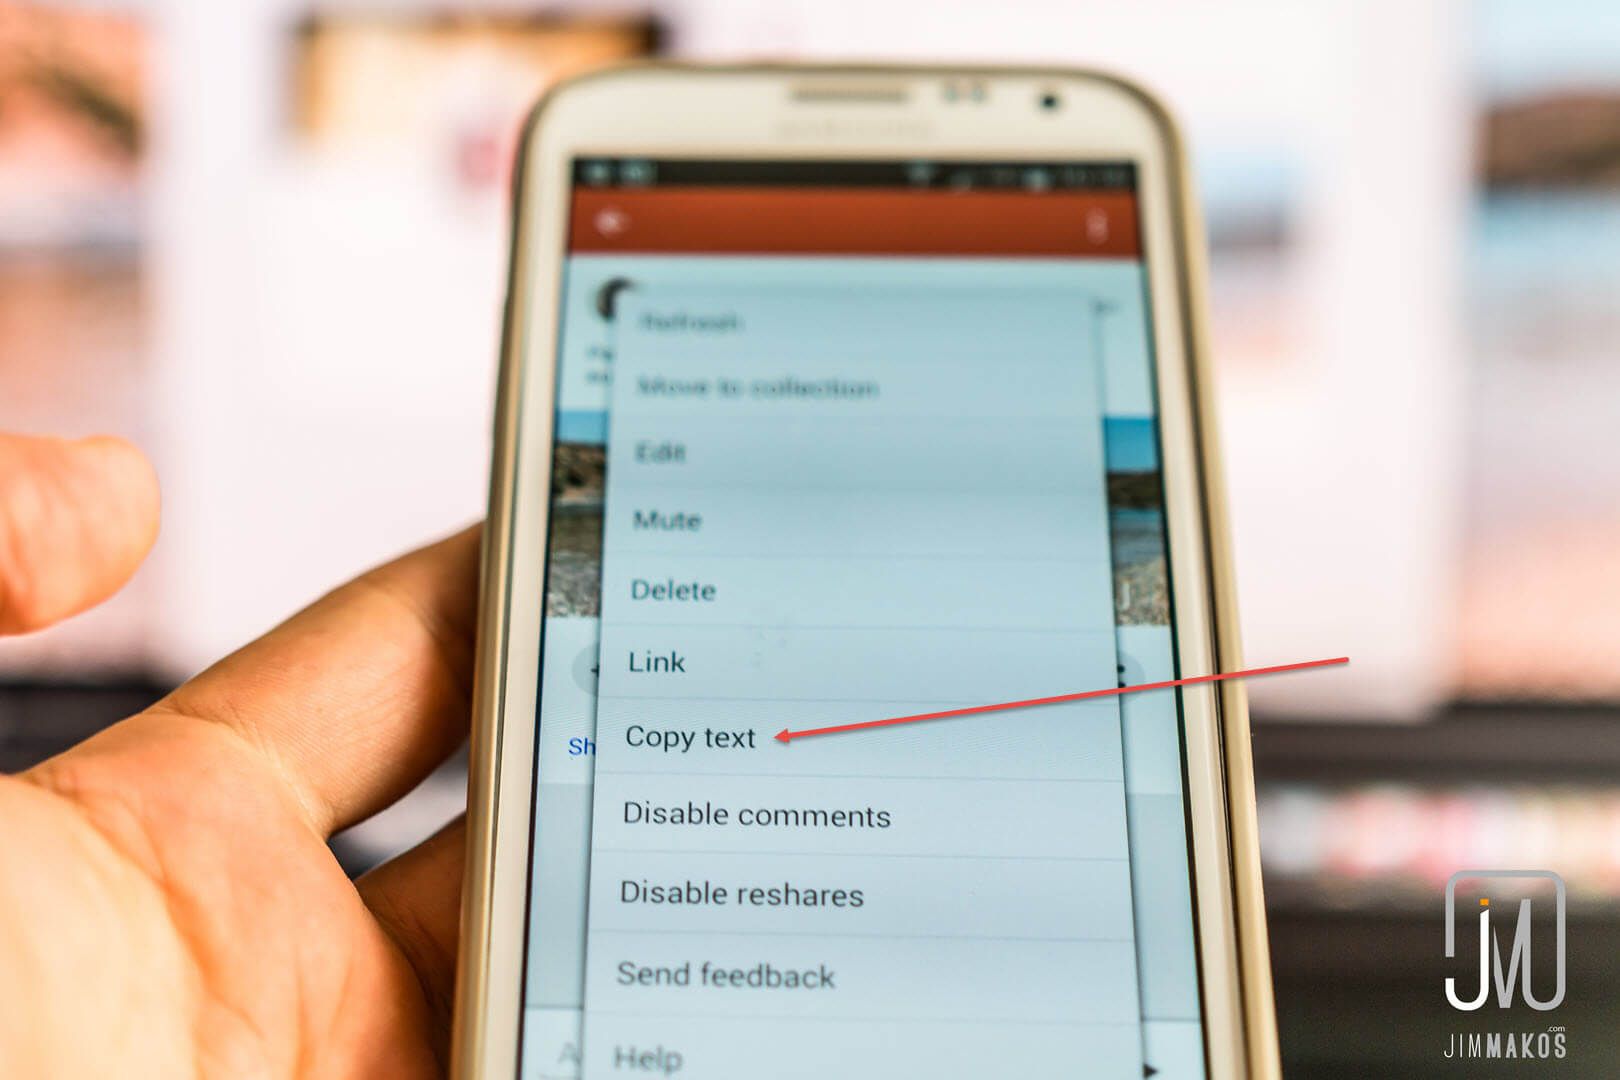
…I move on to Instagram and turn on my smartphone. I find the Google+ post I just shared,…
…I copy the post’s text,…
…and I paste the text on Instagram that accompanies the photo.
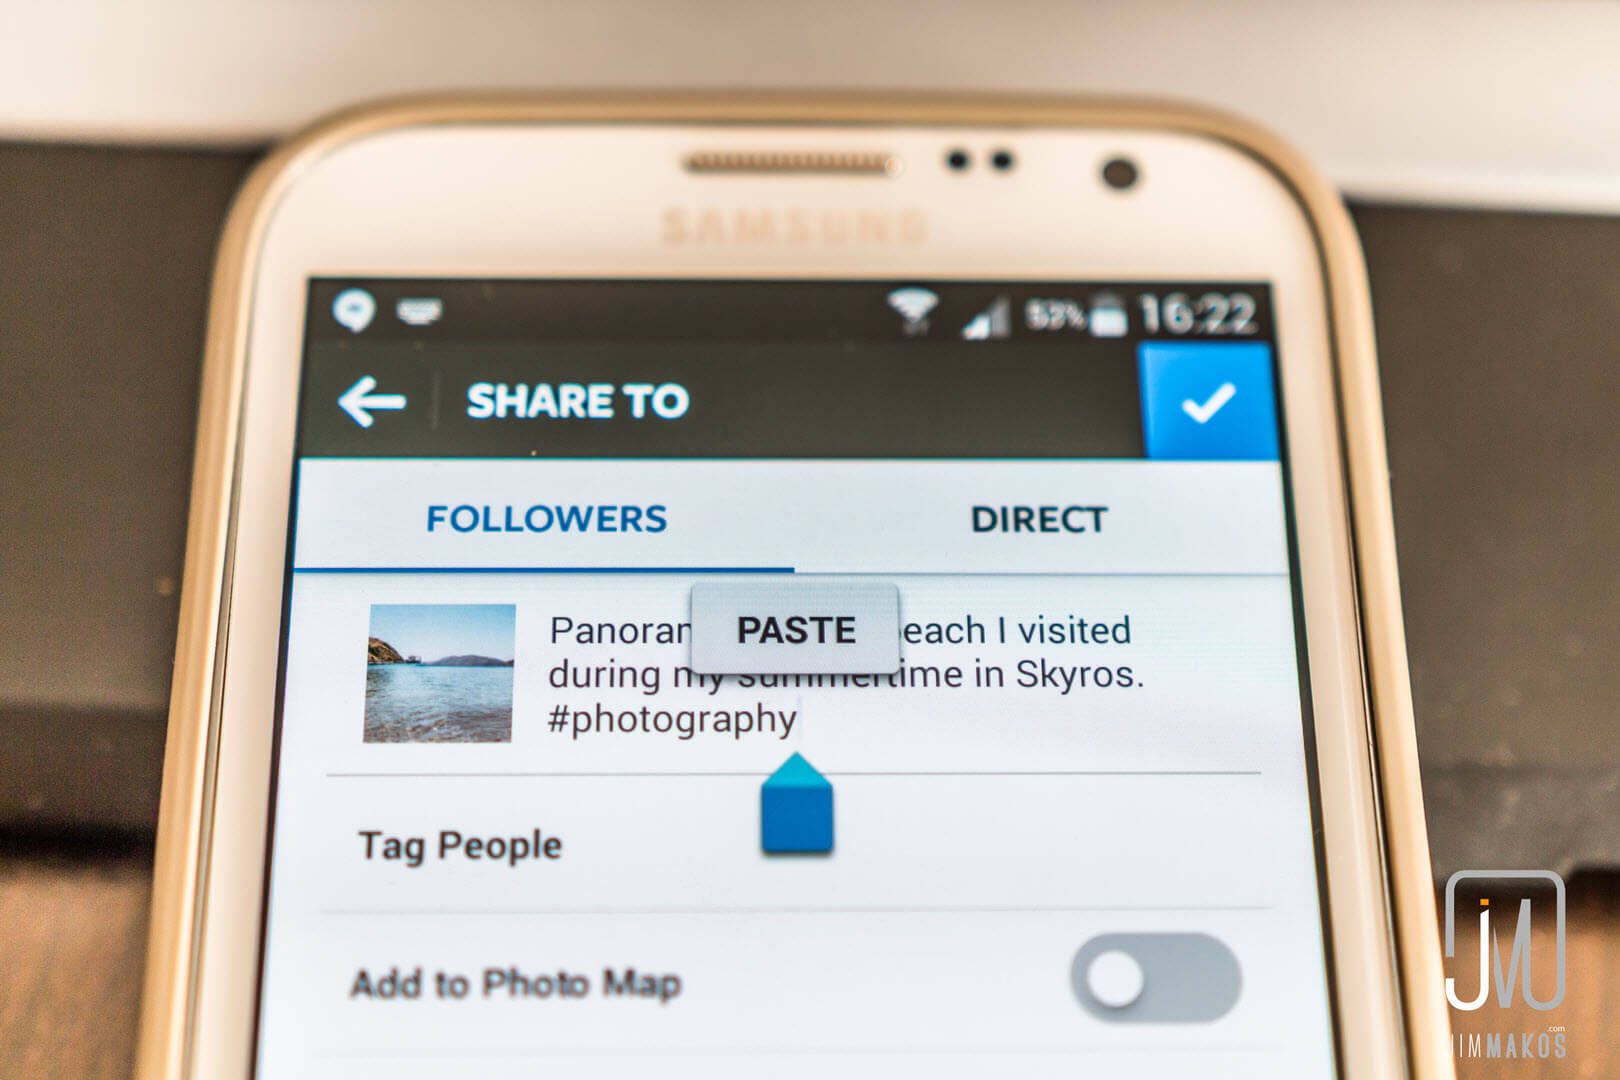
Voila! The photo is EVERYWHERE. Don’t forget to add tags to your picture on Instagram.
